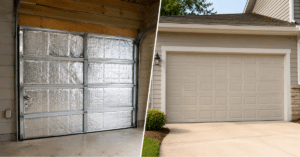
A garage door opener can be a game-changer for your home—offering unmatched convenience, enhanced safety, and even increased property value. Whether you’re replacing an outdated unit or setting one up for the very first time, learning how to install garage door opener is a smart and cost-effective DIY project. Instead of hiring professionals and paying extra for labor, you can take control of the process and complete it with just a few basic tools and a little guidance. Plus, understanding how your opener works gives you the advantage of easier maintenance and troubleshooting in the future.
This comprehensive guide will walk you through each step to install a garage door opener safely and correctly—even if you’re a beginner with no prior installation experience.
🚧 Why DIY Garage Door Opener Installation?
Before we dive into the installation steps, let’s look at why so many homeowners choose to install garage door openers themselves:
- Cost-Effective: Save on professional labor fees
- Hands-On Learning: Understand your garage door system
- Flexibility: Install at your own pace and schedule
- Upgrades: Choose features like smart controls, battery backup, and quiet operation
🧰 Tools and Materials You’ll Need
To install garage door opener equipment, gather these tools first:
- Garage door opener kit (chain or belt drive)
- Power drill and bits
- Adjustable wrench
- Screwdrivers (flathead & Phillips)
- Stepladder
- Level
- Measuring tape
- Socket set
- Safety glasses
- Wire staples
- Pencil or chalk line
Optional tools: Stud finder, garage light bulbs (if not included)
🛠️ Step-by-Step Guide to Install Garage Door Opener
🔹 Step 1: Inspect the Garage Door
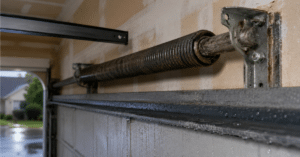
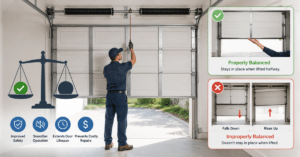
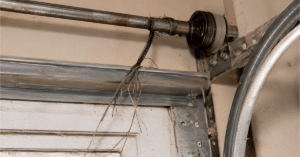
Before beginning, make sure your garage door is balanced and operates smoothly by hand. A damaged or misaligned door can cause stress on the opener.
- Open and close the door manually
- Lubricate rollers and hinges
- Fix any broken springs or tracks before proceeding
🔹 Step 2: Assemble the Opener
Lay out the parts and follow the manufacturer’s instructions to assemble the rail, motor unit, and trolley.
- Connect the rail sections together
- Slide the trolley onto the rail
- Attach the motor unit at one end
- Install the chain or belt along the rail and around the pulley system
- Secure all bolts and nuts tightly
🛠️ Tip: Use a clean, flat workspace for assembly.
🔹 Step 3: Install the Header Bracket
The header bracket supports the rail above the garage door. Position it at the center of the door about 2″ to 6″ above the top of the door when fully closed.
- Use a pencil to mark the position
- Drill pilot holes
- Screw the bracket securely into a wall stud
🔹 Step 4: Attach the Rail to the Header Bracket
Lift the rail into position and fasten it to the header bracket using the clevis pin and fastener provided in your kit.
💡 Use a level to ensure the rail is straight and aligned properly.
🔹 Step 5: Mount the Motor Unit to the Ceiling
With the rail connected, lift the motor unit and position it on a stepladder. Mount it to the ceiling joists using metal hanging straps or angle iron brackets.
- Check for levelness again
- Ensure there’s at least 2” of clearance above the opener
- Secure it with lag screws into ceiling joists
🛑 Safety note: Never mount to drywall only—always use structural support.
🔹 Step 6: Connect the Door Arm to the Garage Door
The curved door arm connects the opener’s trolley to the garage door.
- Attach one end of the arm to the trolley
- The other end goes to the garage door bracket
- Make sure the door arm is straight and properly aligned
- Manually open and close to check for smooth motion
🔹 Step 7: Install Safety Sensors and Wiring
Modern garage door openers come with infrared safety sensors that prevent accidents.
- Mount sensors 6 inches above the floor on each side of the door
- Run the low-voltage wires along the wall and secure with staples
- Connect the wires to the motor unit as per the instruction manual
💡 Make sure the sensors are facing each other and the indicator lights are solid.
🔹 Step 8: Install the Wall Control Panel
Choose a convenient location near the garage door entrance. Mount the control panel using included screws and connect it to the opener.
- Follow wire routing instructions carefully
- Keep the wires neat using wire staples
🔹 Step 9: Power Up and Program the Opener
Plug the opener into a grounded outlet. Most units will require:
- Setting the open and close limits
- Adjusting the force settings
- Testing the auto-reverse safety feature
- Pairing remote controls or smartphone apps
Test the entire system after programming. If your opener comes with Wi-Fi or Bluetooth, follow the app guide to finish setup.
🧠 Final Tips for Safe & Efficient Operation
- Lubricate moving parts every 6 months
- Test safety sensors monthly
- Replace remote batteries annually
- Keep the manual release cord accessible
- Use LED bulbs to reduce radio interference