A broken or frayed garage door cable can cause serious issues, from an uneven door to complete malfunction. If left untreated, it may even pose safety risks to your family and property. Learning how to repair garage door cable correctly ensures your door operates smoothly while saving you costly professional repairs. This guide will walk you through everything you need to know, including the tools required, safety precautions, and a detailed repair process.
Understanding the Garage Door Cable
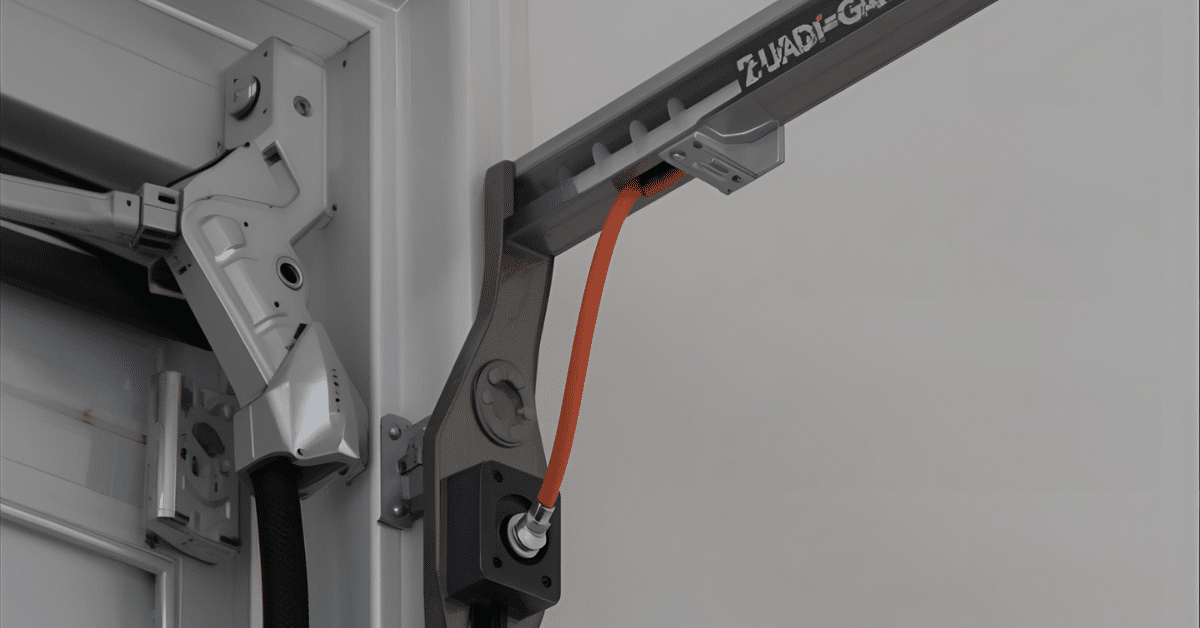
Before diving into the repair process, it’s essential to understand what the garage door cable does. Garage door cables work alongside the springs to lift and lower the door evenly. Over time, these cables can fray, stretch, or break due to regular wear and tear, rust, or improper tension. Knowing how to repair garage door cable starts with identifying the type of cable you have—torsion or extension.
Types of Garage Door Cables
- Torsion Cables: Located at the bottom corners of the door and work with the torsion springs.
- Extension Cables: Attached to the sides of the door and paired with extension springs.
Recognizing the cable type ensures you purchase the correct replacement and follow the appropriate repair steps.
Signs Your Garage Door Cable Needs Repair
Before attempting any repairs, check for these common symptoms that indicate a failing cable:
- Frayed or broken strands of wire
- The door hanging unevenly
- Slow or jerky movement while opening or closing
- Loud squeaking or snapping sounds
If you notice these issues, it’s time to learn how to repair garage door cable before the problem worsens.
Safety First: Preparing for the Repair
Garage door cables are under high tension, making repairs potentially dangerous. Safety is a priority when handling this task. Follow these precautions before starting:
- Disconnect Power: Unplug the automatic opener to avoid accidental activation.
- Secure the Door: Clamp locking pliers or C-clamps on the door tracks to prevent movement.
- Wear Protective Gear: Gloves and safety glasses are essential to protect against sharp cables and sudden movements.
Tools and Materials You’ll Need
Gather these essential tools and supplies to repair your garage door cable effectively:
- Replacement garage door cable (specific to your door model)
- Wrenches and pliers
- Adjustable wrench or socket set
- Stepladder
- Safety gloves and eye protection
Having everything on hand will make the process smoother and faster.
Step-by-Step Guide on How to Repair Garage Door Cable
The following step-by-step instructions outline how to repair garage door cable safely and efficiently.
Step 1: Disconnect the Opener
Pull the emergency release cord to disengage the garage door opener. This ensures the door remains in manual mode.
Step 2: Secure the Door in Place
Use locking pliers to hold the garage door securely on the track. This prevents sudden movements during the repair.
Step 3: Remove the Damaged Cable
Locate the damaged cable and carefully detach it from the drum or pulley system. Use pliers or a wrench to loosen the set screws holding the cable in place.
Step 4: Install the New Cable
Attach the new cable to the bottom bracket of the door, making sure it’s securely fastened. Feed the cable through the pulley system or drum as required.
Step 5: Adjust Cable Tension
Proper tension is crucial for smooth operation. Adjust the cable by turning the drum or pulley until the cable is tight but not overly stretched.
Step 6: Test the Door
Once the new cable is installed, remove the clamps and slowly lift the door manually to check for smooth movement. Reconnect the opener once you’re satisfied with the operation.
Common Mistakes to Avoid
When learning how to repair garage door cable, avoid these frequent errors:
- Over-tightening the cable, which can strain the door and springs.
- Using the wrong type of replacement cable.
- Forgetting to disconnect the power before starting the repair.
Avoiding these mistakes ensures a safe and long-lasting repair.
When to Call a Professional
While it’s possible to repair a garage door cable yourself, some situations require professional help. If the spring system is also damaged, or if you’re uncomfortable working with high-tension cables, hiring a certified technician is the safest option. Professional repairs can prevent injuries and further damage.
Maintenance Tips to Prevent Future Cable Damage
After learning how to repair garage door cable, take preventive measures to extend its lifespan:
- Lubricate Moving Parts: Apply a silicone-based lubricant to the cables, pulleys, and springs every few months.
- Inspect Regularly: Check for fraying, rust, or loose connections at least twice a year.
- Avoid Overuse: Don’t slam or force the garage door open or closed.
Routine maintenance reduces the need for frequent repairs and keeps your door operating smoothly.
Final Thoughts
Knowing how to repair garage door cable empowers homeowners to handle minor issues without costly service calls. With the right tools, safety precautions, and this step-by-step guide, you can replace damaged cables and keep your garage door functioning like new. Regular inspections and proper maintenance will help you avoid future problems and extend the life of your garage door system.