A garage door is one of the hardest-working parts of your home, operating multiple times each day. Over time, its components—especially the rollers—can wear out, causing noise, friction, or even door misalignment. Knowing how to replace garage door rollers is an essential skill for homeowners who want to keep their door running smoothly and quietly.
Replacing the rollers not only improves operation but also extends the life of your garage door and opener. In this comprehensive guide, you’ll learn what garage door rollers do, how to identify when they need replacing, and the safe step-by-step process for doing it yourself—without damaging your door or risking injury.
What Are Garage Door Rollers and Why They Matter
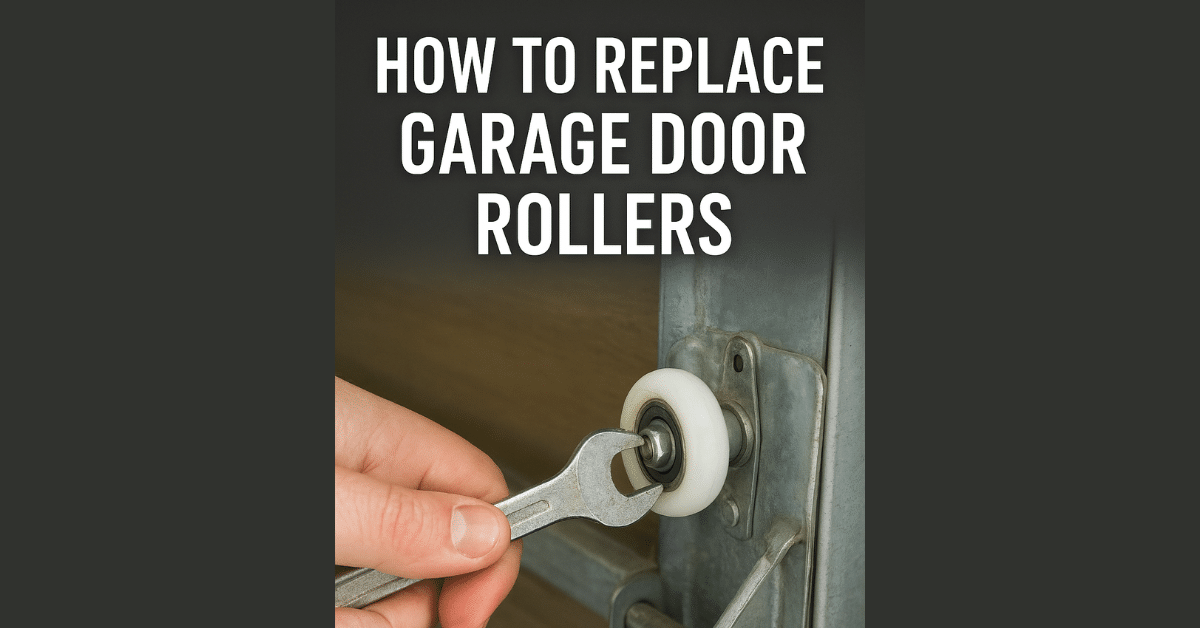
Garage door rollers are small wheels that move along the metal tracks on either side of the door. They ensure smooth, stable, and quiet operation every time the door opens or closes. Depending on your garage door system, these rollers can be made of nylon, steel, or plastic—each offering different durability and noise levels.
- Nylon rollers are quiet and long-lasting, ideal for residential doors.
- Steel rollers are strong and durable but tend to be noisier.
- Plastic rollers are affordable but wear out faster than other types.
If your garage door squeaks, jerks, or feels unbalanced, it may be time to learn how to replace garage door rollers before the problem worsens.
Signs That Your Garage Door Rollers Need Replacement
Recognizing the early warning signs of worn-out rollers can save you from costly repairs later. Here’s what to look for:
- Loud grinding or squeaking noises when the door operates.
- Jerky or uneven movement of the door while opening or closing.
- Visible wear or cracks on the roller wheels.
- Loose rollers that wobble in the track.
- Slow response from the opener due to friction in the tracks.
If you notice one or more of these symptoms, it’s a clear sign that your rollers need attention.
Safety First: Precautions Before You Begin
Replacing garage door rollers involves working with heavy moving parts under tension. Before you start, follow these safety precautions:
- Unplug the opener: Always disconnect power to prevent accidental operation.
- Keep the door closed: It’s safer and easier to replace rollers when the door is down.
- Use locking pliers or clamps: Secure the tracks to prevent movement during repair.
- Wear gloves and eye protection: To protect against sharp edges or debris.
- Have a helper: If possible, ask someone to assist, especially with tall or heavy doors.
If your garage door uses torsion springs, extreme caution is necessary. In such cases, consider hiring a professional for safety reasons.
Tools and Materials You’ll Need
Before starting, gather the necessary tools to ensure a smooth process:
- Replacement garage door rollers (nylon or steel)
- Adjustable wrench or socket set
- Flathead screwdriver
- Locking pliers or clamps
- Step ladder
- Safety gloves
- Garage door lubricant
Having everything ready will make replacing your garage door rollers much easier and safer.
Step-by-Step Guide: How Do You Replace Garage Door Rollers
Step 1: Disconnect the Power and Secure the Door
Start by unplugging the garage door opener to prevent any accidental movement. Clamp locking pliers onto the track just below the bottom roller to keep the door in place.
Step 2: Remove the Roller Bracket
Locate the roller bracket on one side of the door (usually near the top). Use a wrench to remove the bolts securing it. Carefully pull out the old roller from the bracket.
Step 3: Replace the Bottom Rollers
To replace the bottom rollers, you’ll need to disconnect the lift cable attached to the bottom bracket. Be cautious—this part is under tension. Slide the old roller out of the track and insert the new one.
Step 4: Replace the Middle Rollers
Open the door halfway and secure it in place with clamps. Use a flathead screwdriver to gently bend the track opening just enough to remove the roller. Slide the old roller out and the new one in, then straighten the track back into position.
Step 5: Replace the Top Rollers
Use your ladder to reach the top rollers. Remove the bracket holding them, swap out the old rollers, and reinstall the bracket securely.
Step 6: Lubricate and Test the Door
Once all rollers are replaced, apply a silicone-based garage door lubricant to the tracks and roller stems. Remove the clamps, reconnect power, and test the door. It should now move smoothly and quietly without jerking or grinding noises.
Common Mistakes to Avoid When Replacing Garage Door Rollers
- Skipping lubrication: Friction will wear out your new rollers faster.
- Using the wrong roller type: Always match the size and material to your door’s specifications.
- Forgetting safety steps: Never skip disconnecting power or securing the door.
- Bending the track too much: This can cause alignment issues or derail the rollers.
Avoiding these mistakes ensures your door operates efficiently and safely for years to come.
The Right Time to Call a Professional
While learning how to replace garage door rollers can save you money, not all doors are ideal for DIY repairs. If your system has torsion springs, extensive rust, or misaligned tracks, it’s best to hire a certified technician. Professionals have the right tools and expertise to handle tension safely and restore your garage door’s performance.
Maintenance Tips for Longer Roller Life
Once you’ve replaced the rollers, regular maintenance will help them last longer:
- Lubricate rollers and hinges every few months.
- Inspect tracks for dirt, rust, or dents.
- Check alignment to prevent uneven wear.
- Tighten loose bolts or screws periodically.
- Schedule annual inspections for peace of mind.
A well-maintained garage door will not only operate quietly but also prevent costly future repairs.
Conclusion
Understanding how to replace garage door rollers empowers homeowners to handle one of the most common garage door issues safely and effectively. By following proper safety procedures, using the right tools, and replacing worn-out rollers promptly, you can extend the life of your garage door, reduce noise, and improve efficiency.
However, if your garage door involves high-tension springs or seems unstable, don’t risk injury—contact a professional technician. A smooth-running door is more than just convenience; it’s a key part of your home’s safety and daily comfort.
FAQs
Q1: How often should I replace my garage door rollers?
A: Most rollers last between 5 to 10 years, depending on material and usage frequency.
Q2: Are nylon rollers better than steel rollers?
A: Yes, nylon rollers are quieter and require less maintenance, while steel rollers are more durable but noisier.
Q3: Can I replace garage door rollers myself?
A: Yes, if you follow proper safety precautions. However, if your door uses torsion springs, professional help is recommended.
Q4: Why is my garage door noisy even after replacing rollers?
A: The issue might be worn-out hinges or unlubricated tracks. Regular maintenance helps reduce noise.
Q5: How much does it cost to replace garage door rollers?
A: DIY replacement costs around $30–$60 for parts, while professional services can range from $100–$200.


